Invoices // Creating invoices
Adding, editing and deleting of invoices can only be done by account managers, once an invoicing addon has been enabled.
Creating an invoice
- Make sure that an invoicing add-on is enabled and clients have been successfully imported (see the invoicing overview for details)
- Go to Invoices
- Click New invoice button in the top-right of the screen (alternatively click the Invoices -> New invoice menu item)

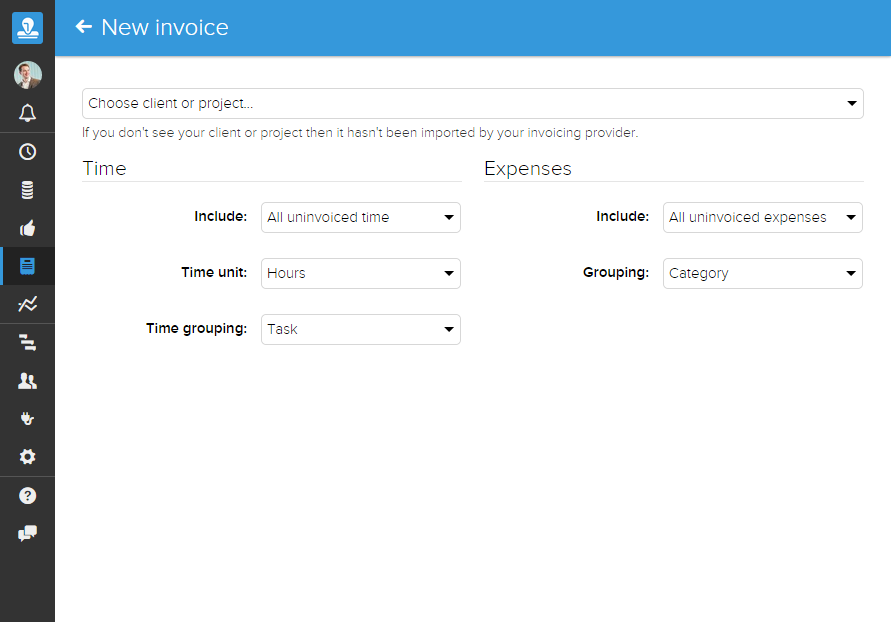
First find the project (or client) that you want to invoice: Choose client or project...
The list will only contain:
- Clients that have been imported from the currently enabled invoicing add-on
- Billable projects associated with those clients
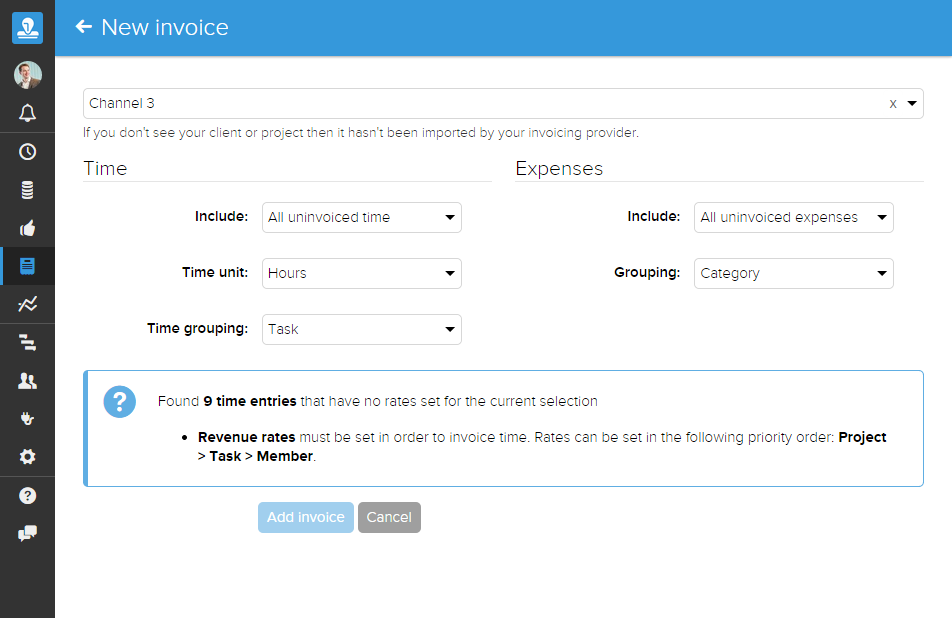
- If you select a client or project that has neither time entries or expenses then a warning message will appear to explaining that fact:

- If you select a client/project that has time entries and/or expenses that could be invoiced, but are not currently in a suitable state, then an information message will appear explaining the issue:
- You can choose what you want to invoice, and the format of the line items by changing the options under the 'Time' and 'Expenses' sections. These options will update the line items in real-time so you can see exactly what your invoice will look like.
- Once any issue(s) with the time entries and/or expenses have been resolved, you will see the line items output below your options:
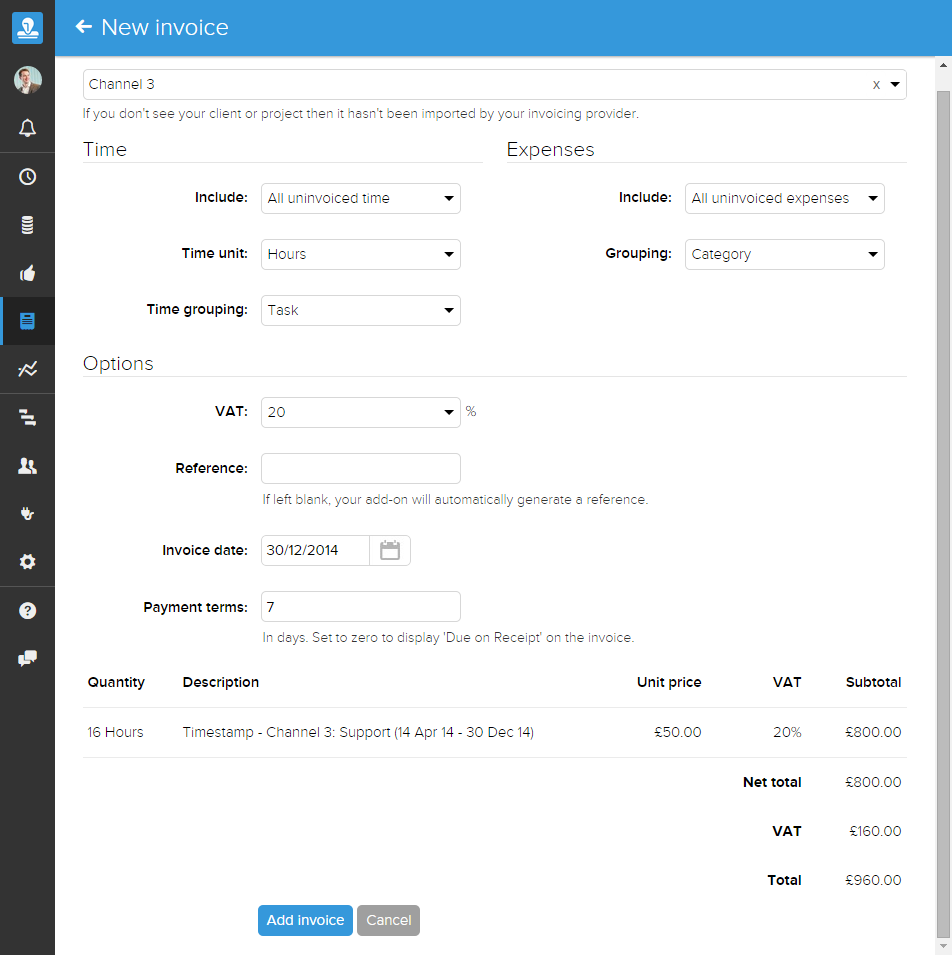
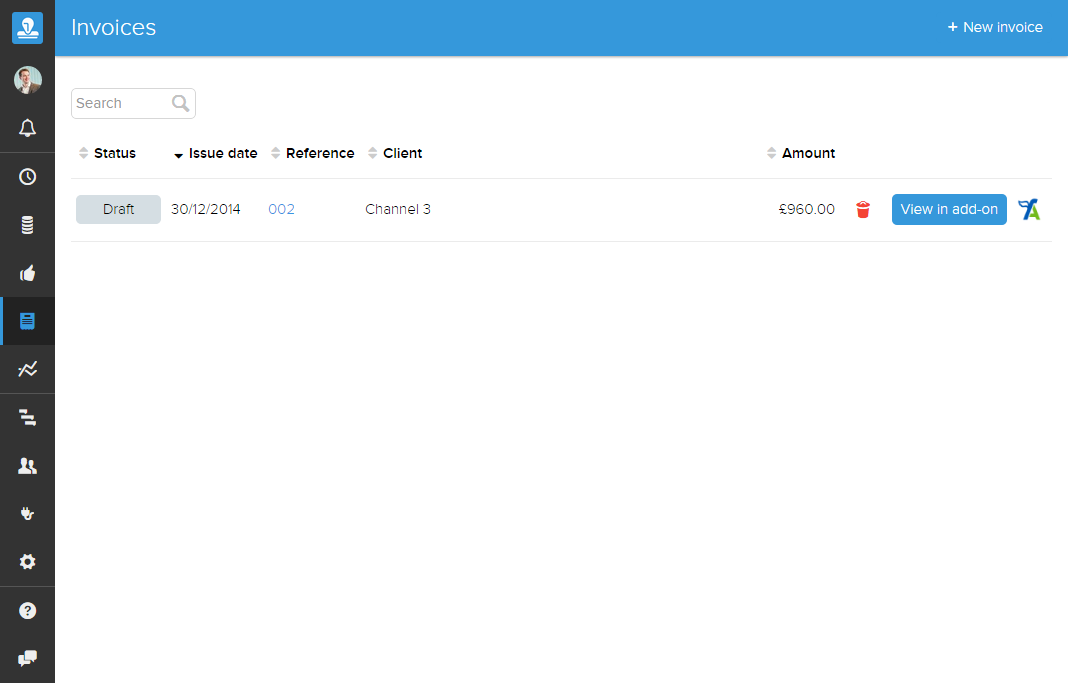
You can now click Add invoice. Once clicked you will be taken to the list of invoices, with your newly created invoice at the top
This list contains the status of the invoice as determined by your invoicing add-on. This status is kept up to date, although may be up to 20 minutes behind your invoicing app. Find out more